Autodesk Infrawork 360

Course Information

Overview

نسعى في هذه الدورة الى تمكين المهندس من استخدام البرنامج بشكل محترف من خلال تفاعله مع مدرب مهندس ممارس للبرنامج في بيئة عمله و ان يسعى الطالب الى استخلاص ما هو مهم و اهم في خفايا البرنامج و نسعى الى تخريج مهندسين قادرين على اسقاط ما تعلموه في بيئة عملهم و تحسينها.
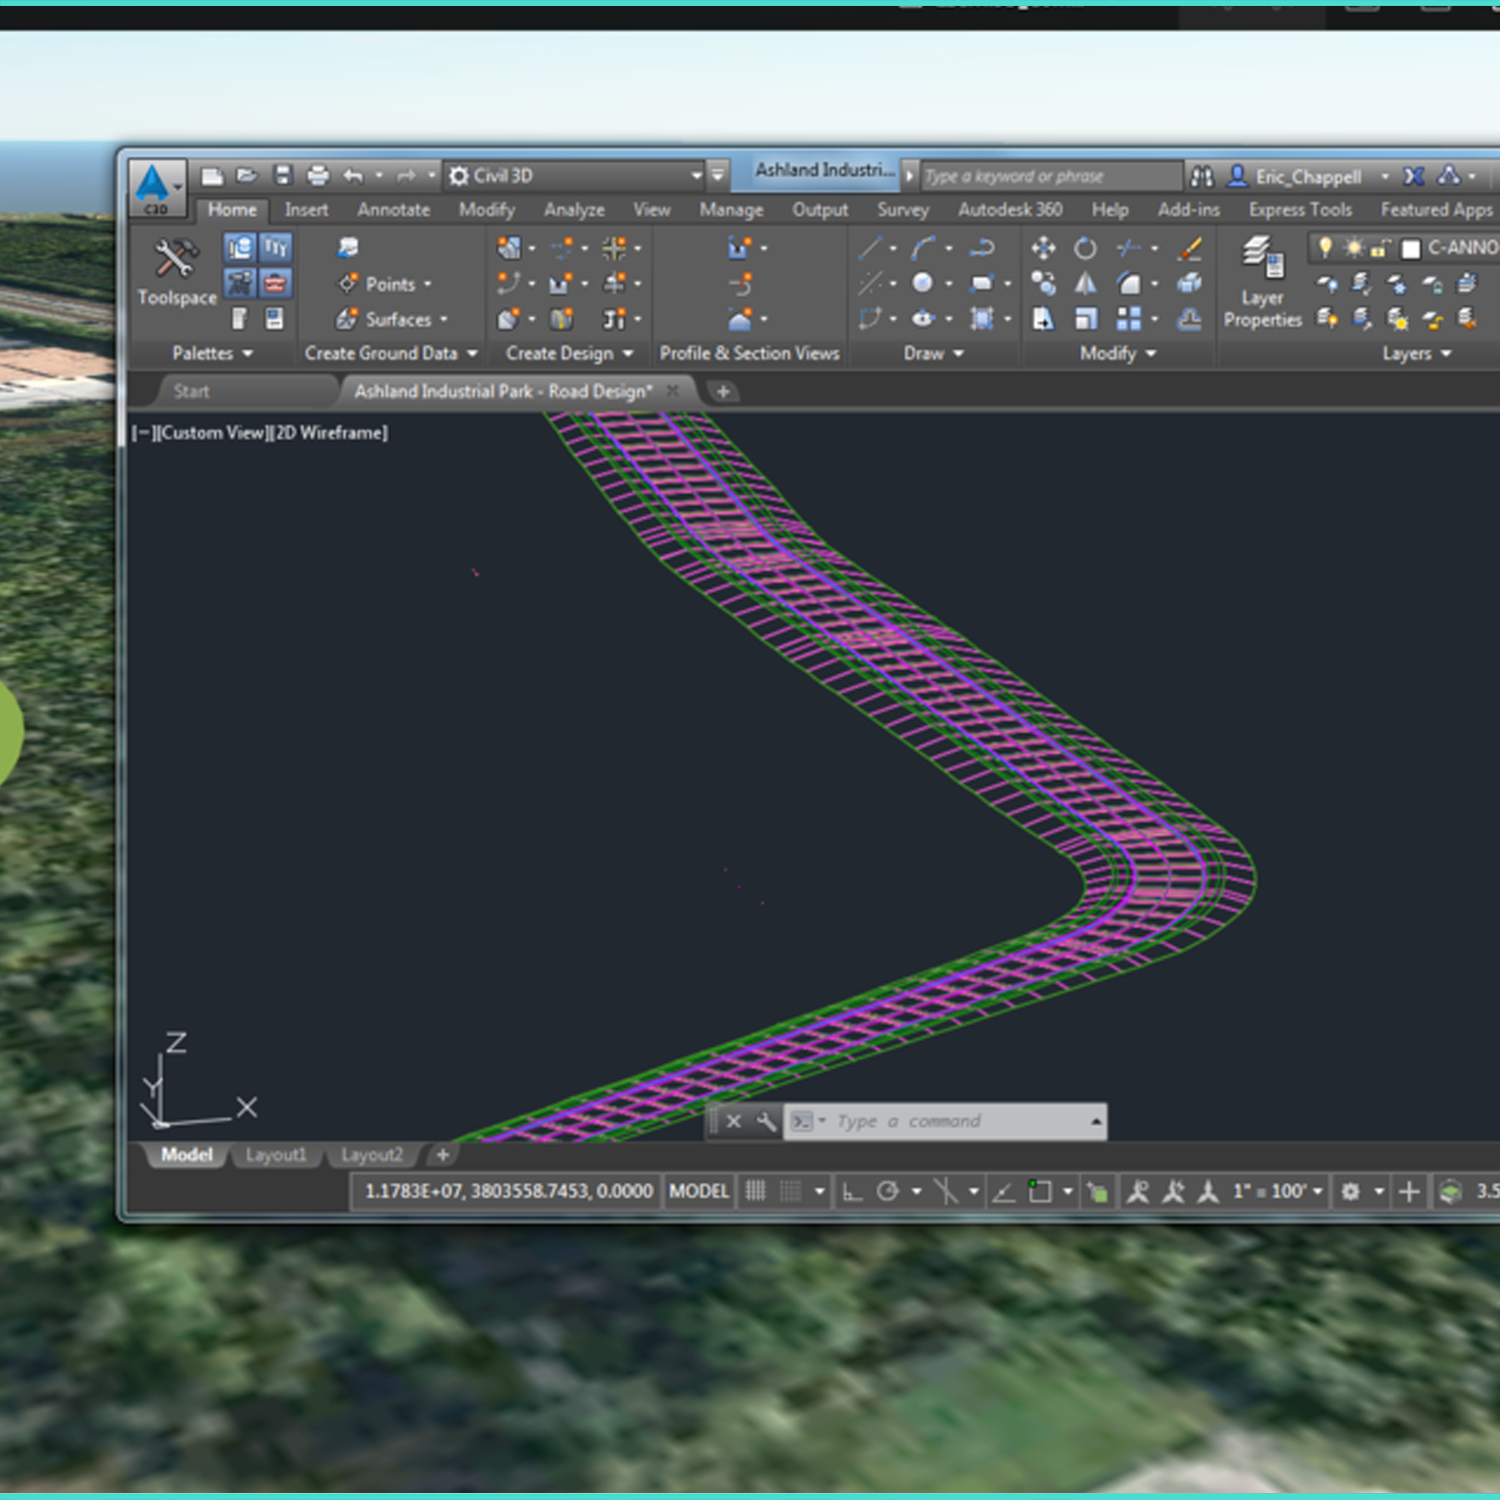
حيث سنتعلم كيفية استخدام البرنامج في الحصول على سطح الارض لاي منطقة بشكل ثلاثي الابعاد يظهر التضاريس وطرق تقسيمها وتوزيع الطرق فيها وكذلك المساحات الخضراء والمساحات المائية و استيرد المباني من البرامج الاخرى
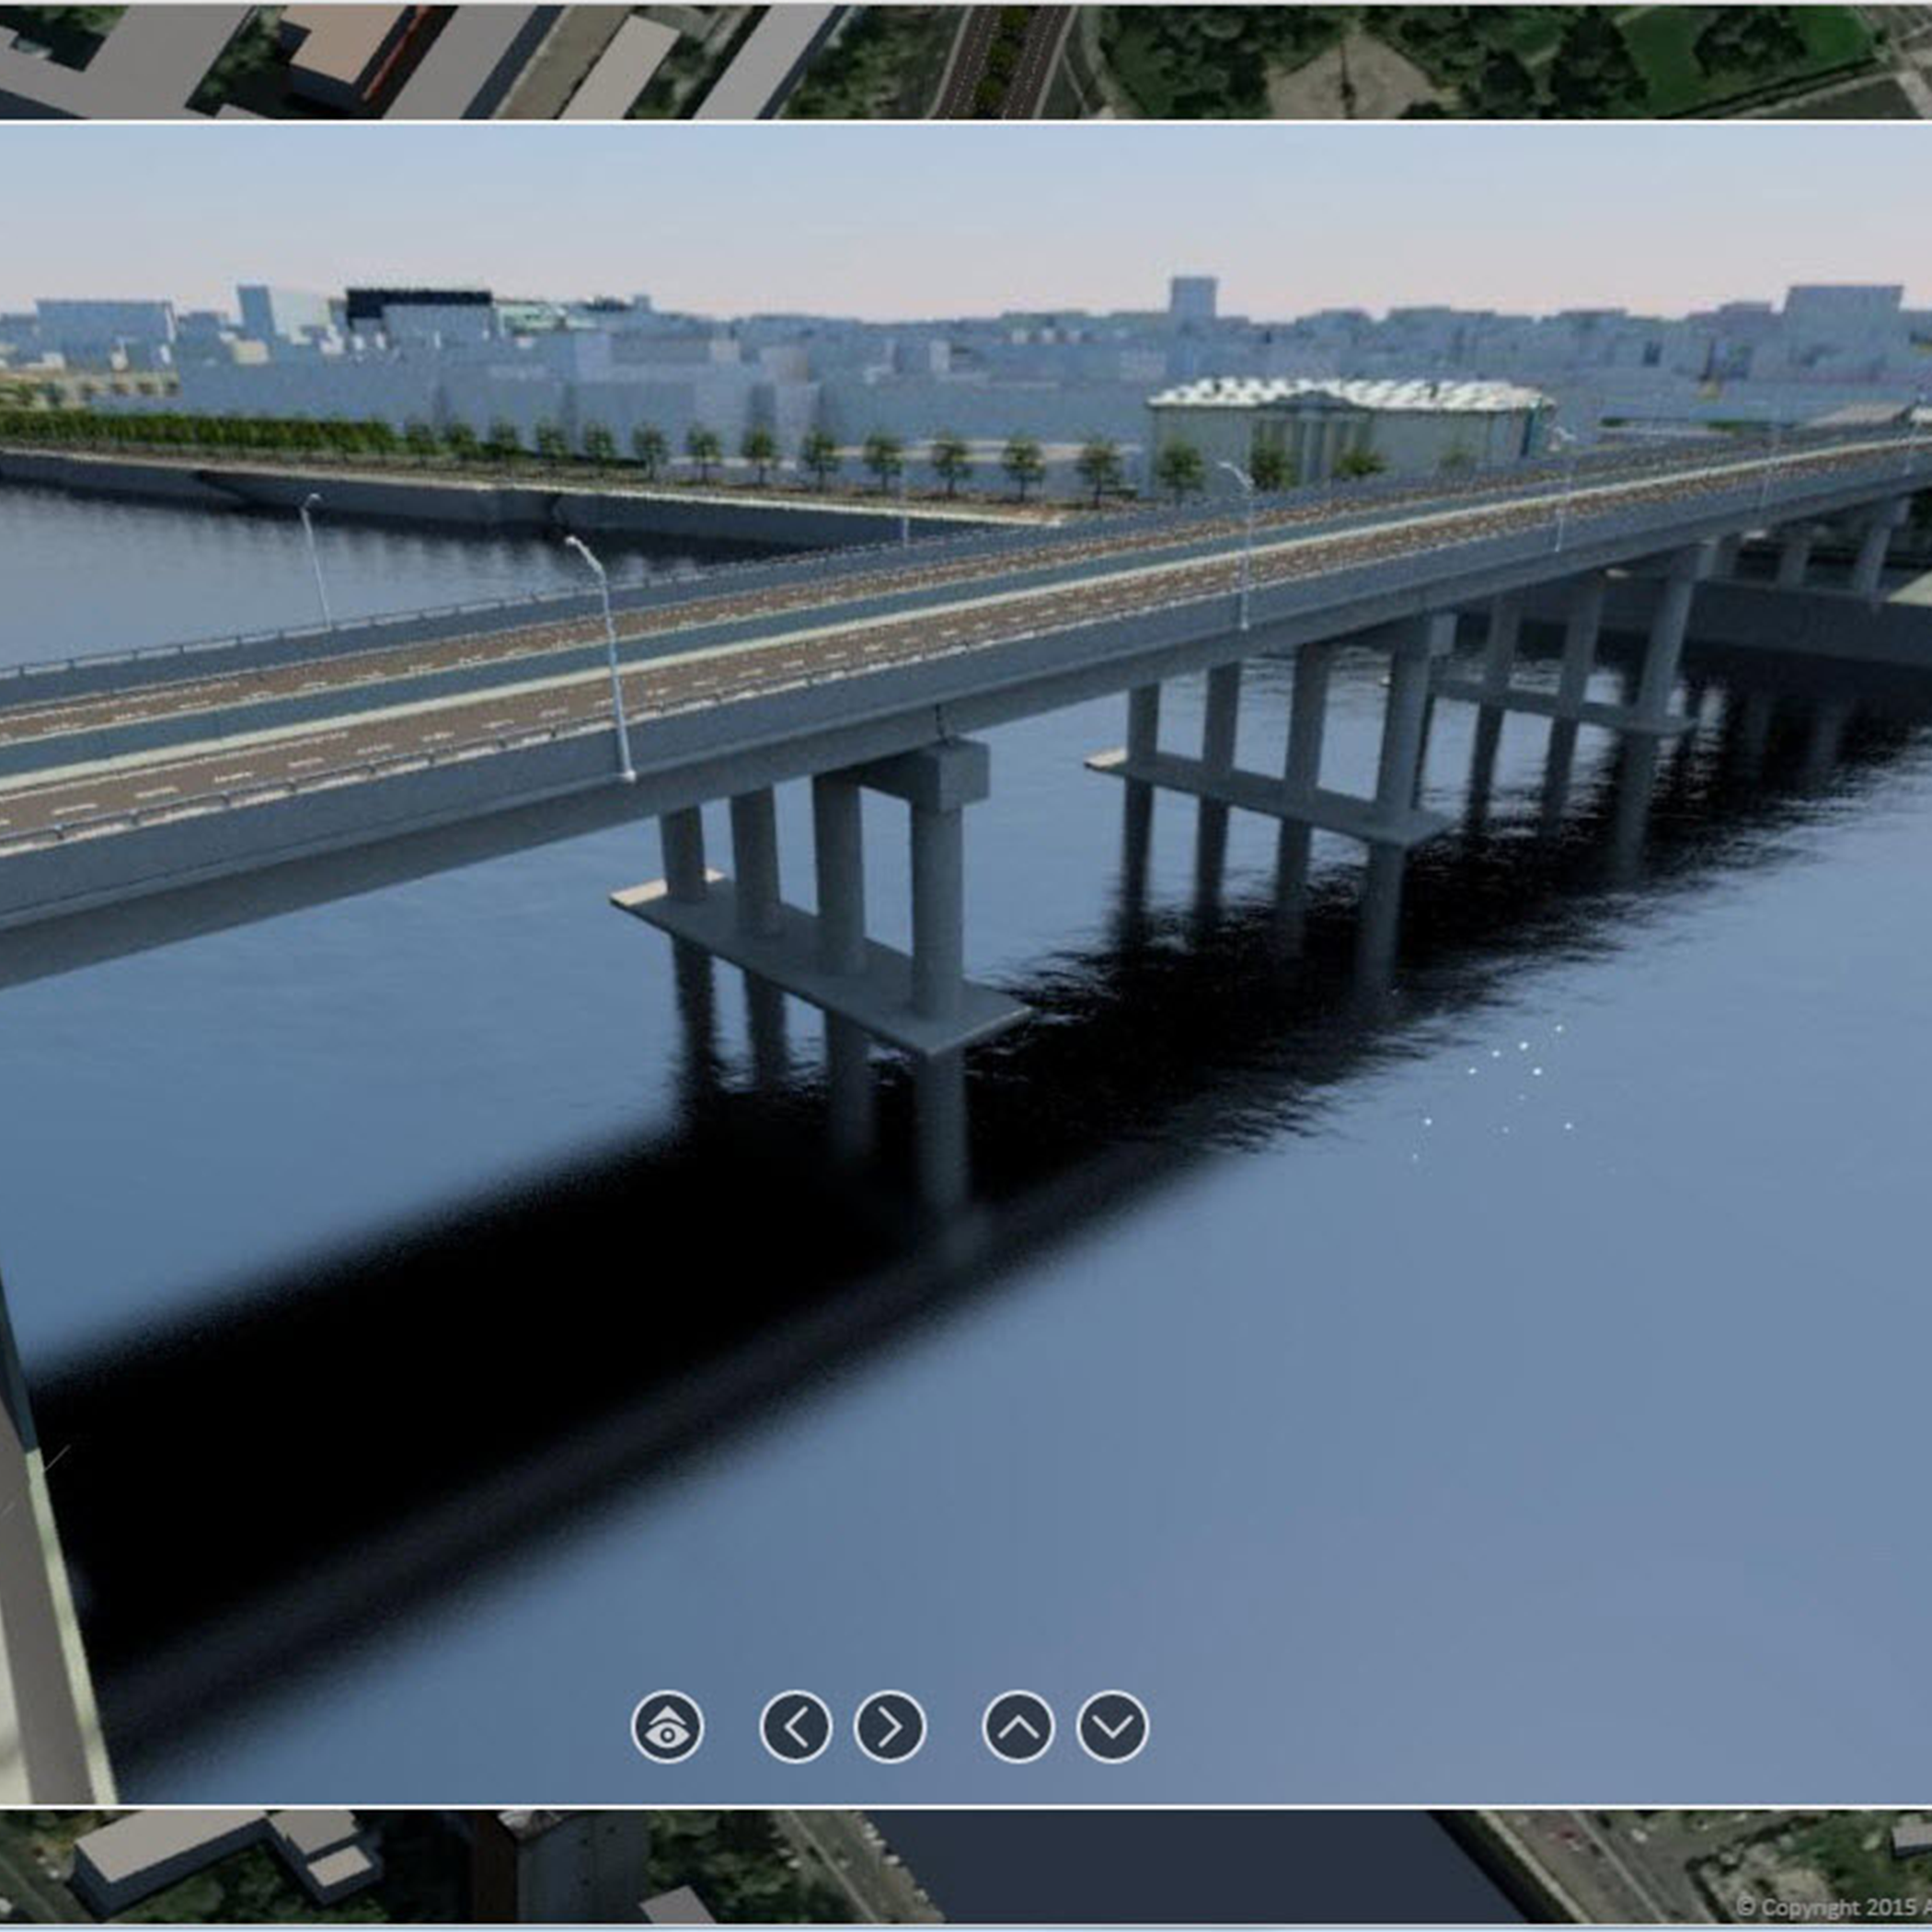
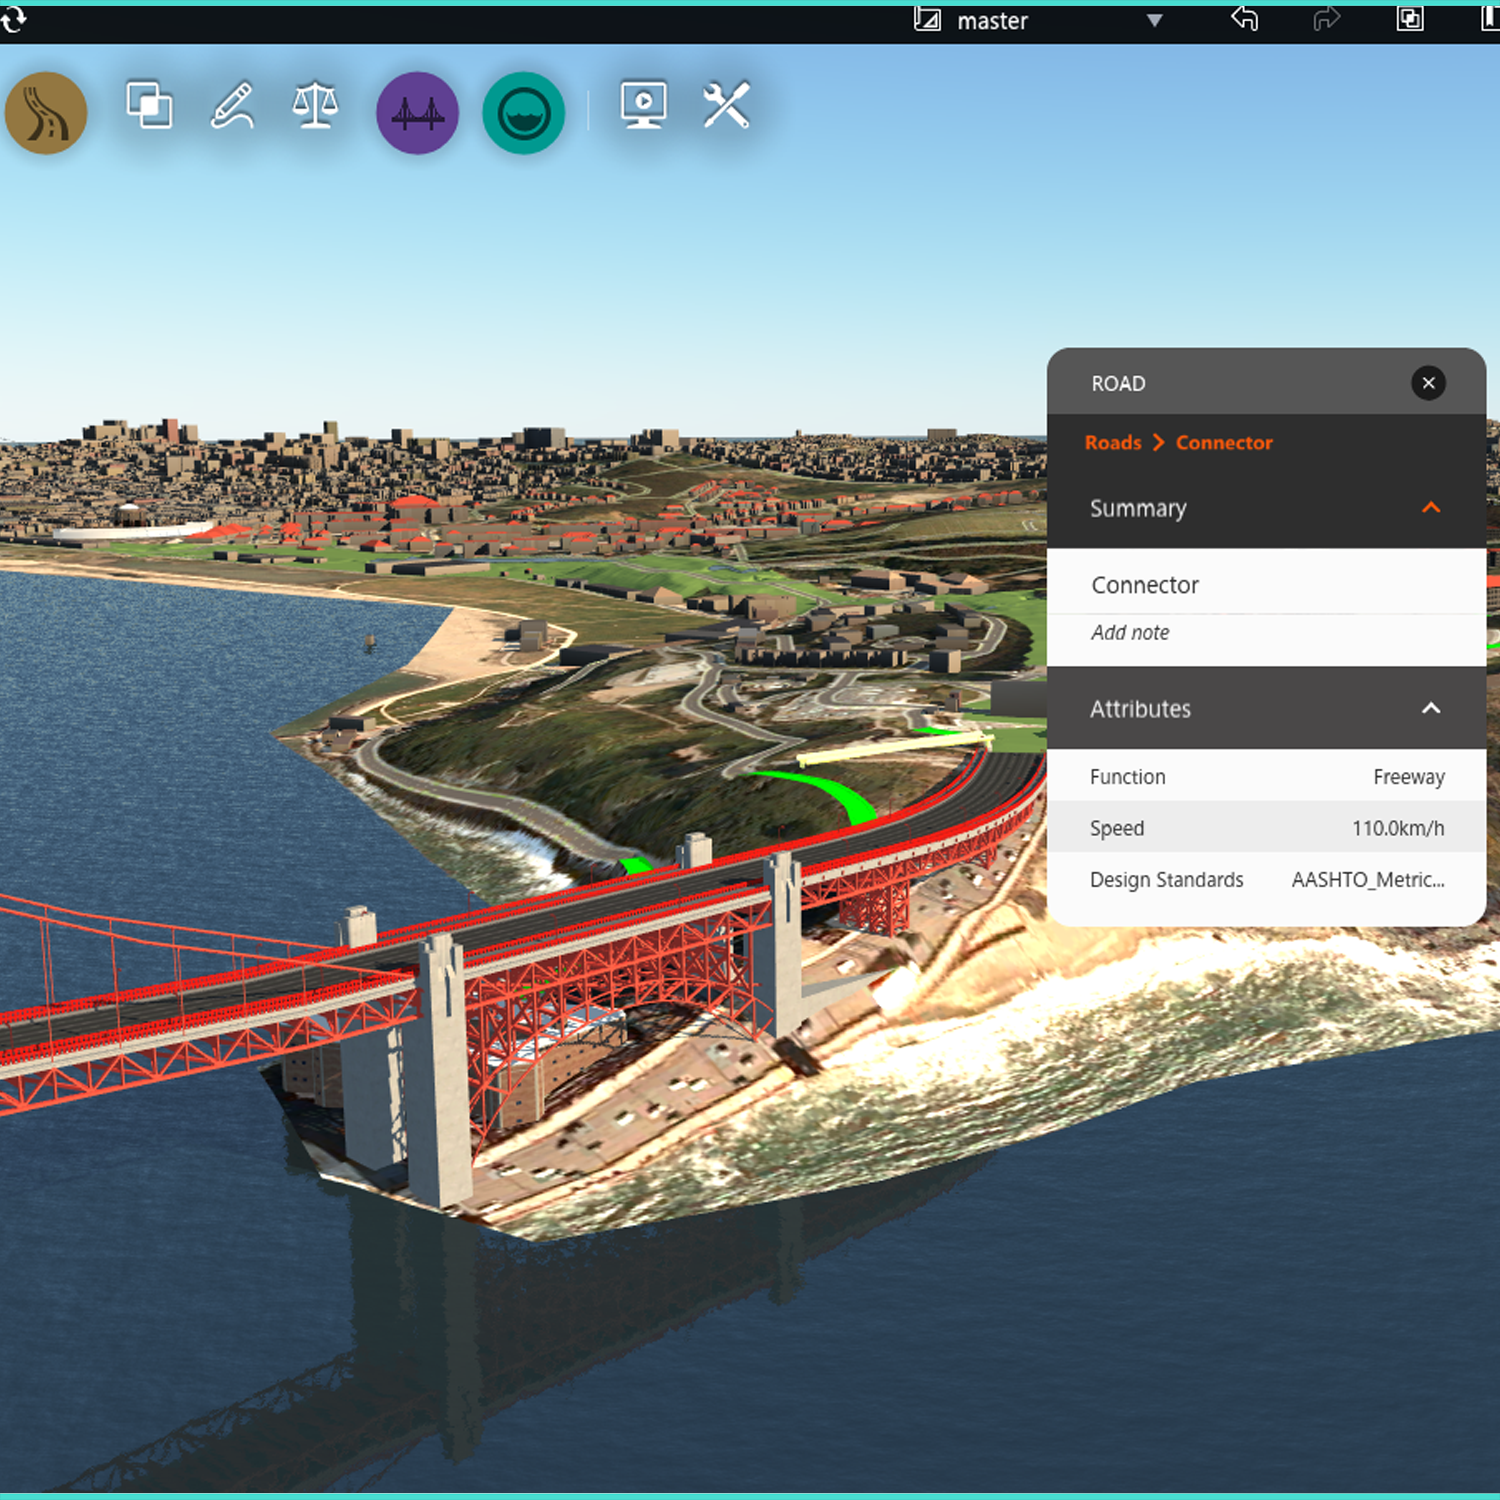
يحتوي هذا البرنامج على تجربه فريده من نوعها في تصدير المشروع بشكل يحاكي الواقع عن طريق الصور والفيديوهات الاحترافيه التي تحتوي على الطرق والتقاطعات بكافة انواعها, والمباني , الديكورات المختلفه وكذلك سهولة الربط بين البرنامج والبرامج الاخرى مثل Revit,civil3d, والكثير من البرامج
الكثير الكثير من المميزات الرائعة سوف نتعلمها معا

Objectives

The Autodesk Subassembly Composer for Autodesk AutoCAD Civil 3D provides a strong set of subassembly functionality for corridor modeling:

  • Define points  using several methods.
  • Define links between points.
  • Define shapes surrounded by links.
  • Define advanced geometry  elements, such as curves, fillets, and intersection points.
  • Get and set marked points.
  • Define auxiliary geometry elements as a basis for other subassembly geometry elements.
  • Assign point, link, and shape codes.
  • Define targets and input/output parameters .
  • Organize geometry elements, or add conditional behavior.
  • Define and set variables.
  • Define complex logic with expressions  and API functions.

Audience

Infrastructure Engineers

Surveyors

Survey Students

Civil Engineers

Civil engineering Students

مهندسي الطرق و الجسور

مهندسي البنية التحتية

مهندسي المساحة

طلاب هندسة المساحة

طلاب الهندسة المدنية

Outline

  • Module 1: 1. Overview of the User Interface
    • Elements of the User Interface
    • User Interface Tour
    • InfraWorks Home
    • Edit Mode, Select Mode
    • The Data Sources Panel
    • Surface Layers
    • Properties Palette
    • Model Explorer Panel
    • The Proposals Manager
    • The Themes Palettes
    • The Style Palette
    • The Style Rules Panel
  • Module 2: 2. Component Roads and Planning Roads
    • a) To add or modify component road transitions
    • b) To modify lane markings
    • c) To set the roadside grading method
    • d) To place road decorations
    • e) About Intersections
    • f) About Roundabouts
  • Module 3:Traffic Simulation and Animation
    • a) About Traffic Simulation
    • b) About Mobility Simulation
  • Module 4: 4. Waterways and Drainage
    • Understanding Creating Data
    • Creating Bookmarks
    • Creating a Proposal
    • Adding Roads and creating (intersection & Roundabout)
  • Module 5: Editing data
    • a. Watershed Analysis
  • Module 6: 5. Add Model Details
    • a. Create Coverages in a Model
    • b. Grading Areas
    • c. Create Buildings in a Model
    • d. Create City Furniture in a Model
  • Module 7: Bridges, Railways, and Tunnels
    • a. Create Bridges
    • b. Create Railways in a Model
    • c. Create Tunnels in a Model
  • Module 8: Data Exchange
    • a) Import Autodesk RVT files
    • b) To publish civil structures to Autodesk Revit
    • c) To export 3D model data for use in Autodesk Revit
    • d) To import terrain
    • e) To import 2D raster terrain overlays
    • f) Video Playlist: Terrain Overlays
    • g) To import 2D vector terrain overlays
    • h) To import ground imagery
    • i) To import coverage areas
    • j) To import grading areas
    • k) To import parcels, easements, and right of ways
    • l) To import bodies of water
  • Manage Proposals
    • a. About Proposals
    • b. To create or open a proposal
    • c. To toggle between 2D and 3D mode
    • d. To merge proposals
    • e. To view proposal statistics
    • f. To delete a proposal from a model
  • Create and Share Presentations
    • a. About Presentations
    • b. About Storyboards
    • c. To create a storyboard
    • d. To add a title to a storyboard
    • e. To add a caption to a storyboard
    • f. To add a camera path to a storyboard
    • g. To create a camera path from a component road
    • h. To import point data as a camera path
    • i. To add an animated view perspective to a storyboard
    • j. To play all or part of a storyboard
    • k. To manage storyboards
    • l. To create a snapshot